

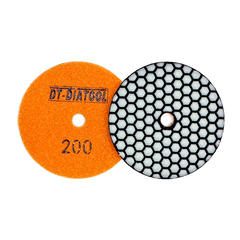


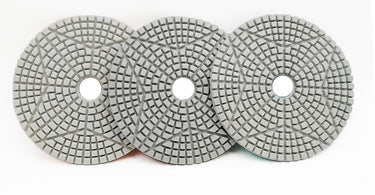
Getting a clean, mirror-like finish on stone slabs or countertops comes down to one simple habit: taking the time to run through the right grit sequence with the proper diamond pad.
Whether you are working with natural stone like granite and marble, engineered quartz, or poured concrete, skipping steps or grabbing the wrong pad will almost always leave you with visible swirl marks, dull spots, or a ruined set of pads.
Here is a practical guide to choosing the right grit sequence for each material, what you need to know about working on concrete, and how DT-DIATOOL diamond polishing pads help you get the job done right.
How Diamond Polishing Grit Sequences Actually Work
Diamond pads remove material through progressive abrasion. Each grit size does a specific job, and skipping steps forces the next pad to work too hard, leaving deep scratches hidden under a fake surface shine.
Coarse Grits (#50, #100, #200): These are for heavy work. Use them to level uneven edges, grind down saw marks, and shape the profile.
Medium Grits (#400, #800): These remove the deep scratch pattern left by the coarse pads, smoothing the stone down to a clean, honed finish.
Fine Grits (#1500, #3000): These refine the surface, bringing out the depth of color and setting up the final shine.
Buff Pads (Black/White Buff): Used with light water or polishing compound for that final pop on high-gloss stone.
Matching the Pad Sequence to the Stone
Different materials handle heat, water, and friction in totally different ways:
Granite: Heavy, hard, and dense. Granite demands sharp diamonds and plenty of water, or specialized high-temp dry pads if you are working dry.
Marble: Soft and sensitive to heat. Marble scratches easily, so you need clean, smooth transitions through the middle grits to avoid deep swirls.
Quartz (Engineered Stone): Held together by resin binders. Too much heat during dry polishing will burn or yellow the resin. Stick to wet polishing or run your grinder at lower speeds with flexible pads.
Working with Concrete: What Makes It Different?
Polishing concrete is a whole different ballgame compared to natural stone. Uncured or exposed concrete is extremely abrasive, porous, and varies in hardness depending on the mix.
Key Rules for Polishing Concrete
-
Concrete Eats Soft Pads Fast: Unpolished cement cream acts like sandpaper against standard resin pads. If you use soft marble pads on raw concrete, they will wear down in minutes. You need pads built with a tougher resin matrix and a heavy diamond load to handle the slurry.
-
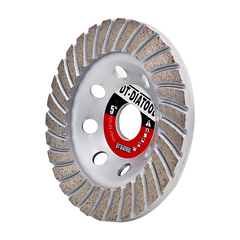
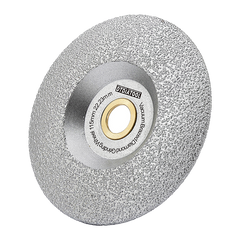
Transition from Metal to Resin: Heavy concrete grinding starts with metal-bond segment tools or coarse #30/#50 copper-bond pads to flatten the surface and expose aggregate. Switch over to resin pads starting around #100 or #200 to clear out the heavy metal scratches.
-
Wet vs. Dry Running: Wet polishing keeps dust down and pads cool, making it ideal for indoor shop work and countertops. If you have to polish dry on a jobsite, make sure your pads can handle high heat so the resin doesn't smear into the porous concrete.
-
Use a Densifier: If you are aiming for a high gloss on concrete, apply a liquid densifier (lithium or sodium silicate) after your #200 or #400 pass. The densifier hardens the soft cement paste, letting your fine pads polish the surface to a crisp shine.
Recommended Grit Sequences
Standard 7-Step Sequence (Granite, Hard Marble, Concrete)
#50 ➔ #100 ➔ #200 ➔ #400 ➔ #800 ➔ #1500 ➔ #3000 ➔ Buff
The go-to sequence for heavy scratch removal, edge shaping, and deep stone restoration.
Concrete Countertop & Slab Sequence
#30/#50 (Metal or Copper Bond) ➔ #100 (Resin) ➔ #200 (Resin) ➔ [Apply Liquid Densifier] ➔ #400 ➔ #800 ➔ #1500 ➔ #3000
Clears heavy grinding marks while preserving pad life against harsh concrete paste.
Fast 3-Step / 4-Step Sequence
Step 1 (#50-#150) ➔ Step 2 (#300-#800) ➔ Step 3 (#1500-#3000)
Ideal for busy production shops working with modern multi-grit diamond pads on light touch-ups.
Why Fabricators Trust DT-DIATOOL Pads
At DT-DIATOOL, we build diamond tools that withstand daily use in real fabrication shops and jobsites.
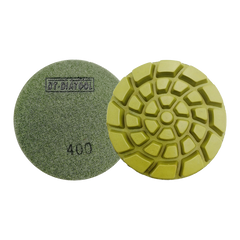
Tough Resin Matrix: Our pads carry high diamond concentrations bound in durable heat-resistant resin, keeping the pad sharp without burning the stone.
Built for Concrete and Hard Stone: We offer heavy-duty resin formulations and copper-bond transition pads specifically designed to handle raw concrete without wearing out prematurely.
Smart Pattern Designs: Channel grooves on the pad face throw off slurry and dust quickly, preventing heat build-up and keeping the cutting surface clean.
Flexible Wet & Dry Options: Available in 3-inch, 4-inch, and 5-inch sizes with color-coded hook-and-loop backings so you can swap pads quickly on the line.
Simple Tips to Get the Most Out of Your Pads
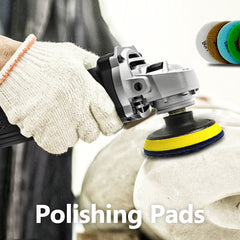
Keep Grinder Speed in Check: Run wet polishers or variable-speed grinders between 2,000 RPM and 4,000 RPM. High speeds generate excess friction, glaze over diamonds, and melt resin pads.
Keep the Pad Flat: Avoid tipping the edge of the pad into the stone. Keep it flat to ensure even wear across the pad face.
Wipe Down Between Grits: Always wash or wipe away slurry between passes. A stray grain of #50 grit left under a #1500 pad will ruin your finish.